Has your Android device become slow, glitchy, or just generally performs poorly? It's possible that your device is running out of storage space.
Running out of memory can negatively impact your device in numerous ways — at its worst, you might not even be able to open apps.
How to free up space on an Android phone or tablet
To get your phone or tablet back up to speed, you'll need to clear some space. Here are several ways to do just that.
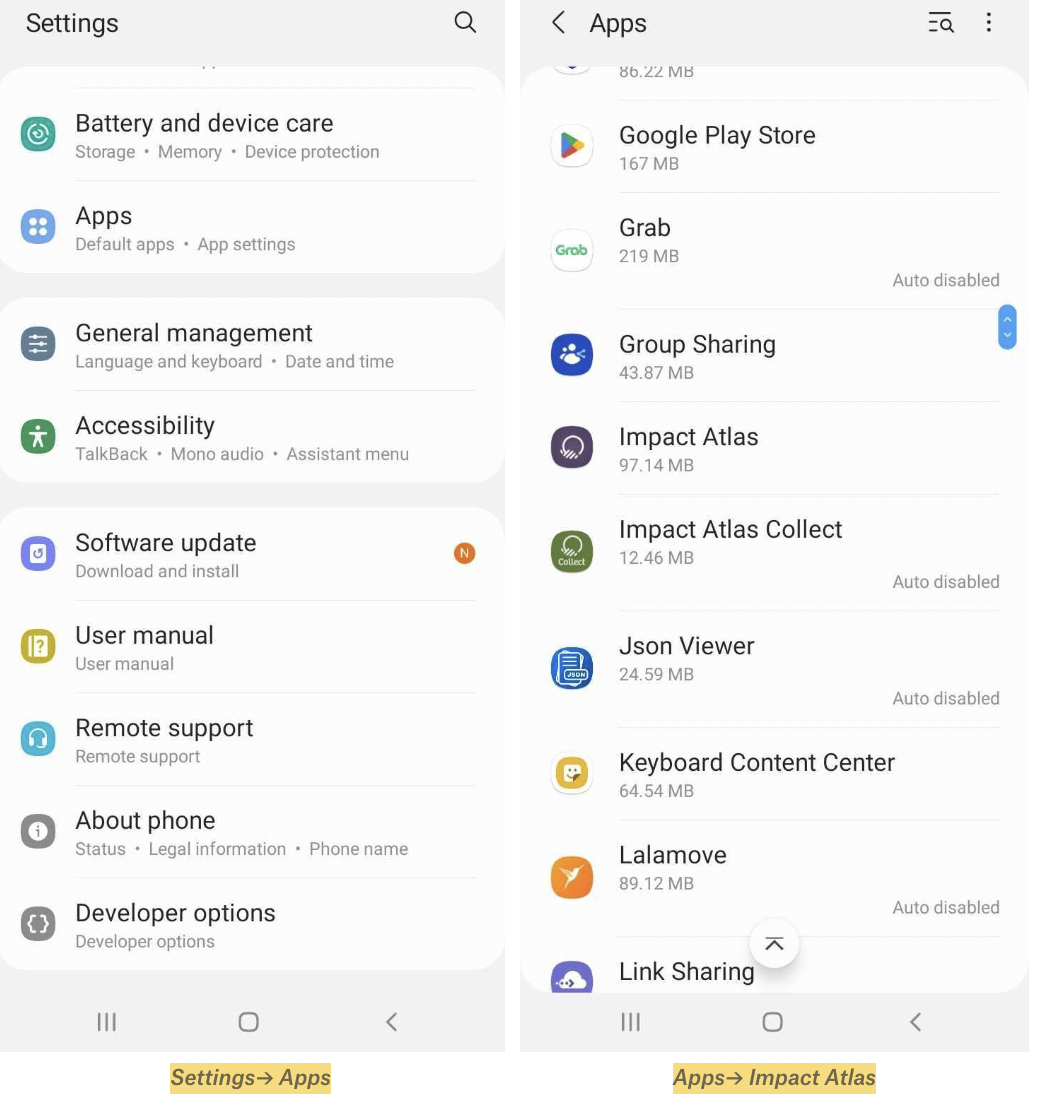
1/ Clear your Android's cache
Clearing your Android's cache removes temporary cookie files, which can take up a lot of digital real estate. It's also one of the fastest and easiest ways to improve your Android device's speed and performance.
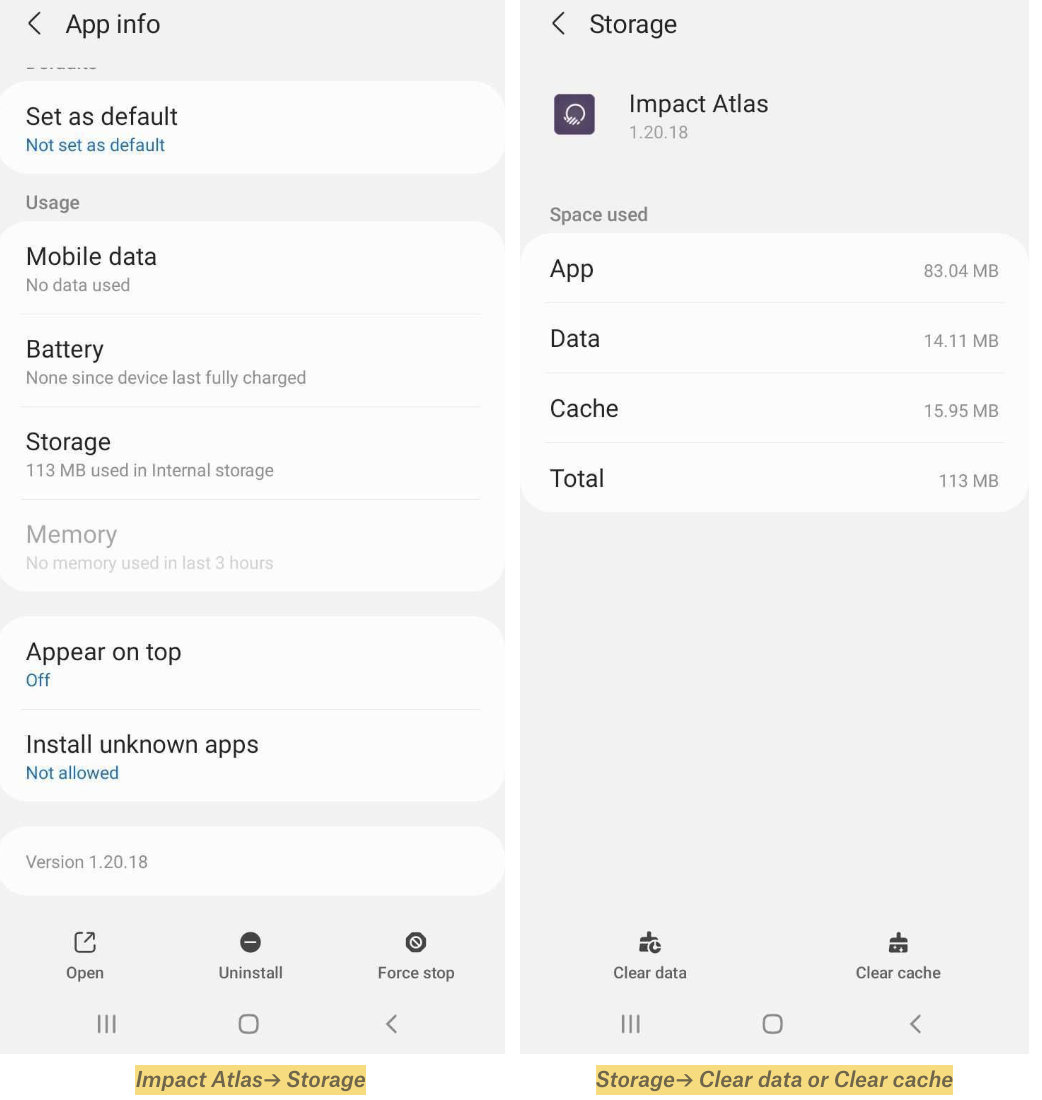
(Note: it is usually safe to clear the cache. However, before you hit “Clear storage,” check to see what your user data is. You don’t want to accidentally delete any important media or documents.)
You can clear cache data for apps on Android by clearing the system cache in your Android settings. It's also important to check your App before clearing data as you might need to sync important data to the server before deleting everything.
.png)
.png)
2/ Delete unwanted apps, photos, or files
A good way to save space is to make sure you’re not clogging up the works with apps that you haven’t used in months.
You can check how long it’s been since you’ve used certain apps, here’s how to find out:
-
Tap on your Play Store app.
-
Tap on your personal icon in the upper right corner and select “Manage apps & device.”
-
Select the Manage tab. On the line below that, the Installed button should be highlighted; if it isn’t, tap on it.
-
To the right of the Apps heading, you’ll see the sorting icon. Tap on that and select “Least used.”
-
Now, you can see the apps that you’ve only used occasionally (if at all) on top of the list. You won’t necessarily want to get rid of them — sometimes an app is fine to have around just in case — but you might catch some that you really don’t need anymore.
3/ Delete the files located in your Downloads folder
Go into your Downloads folder from the app menu and delete whatever you don't need.
4/ Transfer your apps to your Android's Micro-SD card
Some Android devices are compatible with micro-SD cards, which allow you to save additional data without taking up too much memory on your actual device. If your Android device can use a micro-SD card and you've installed it into your device, you can select which apps you'd like to transfer via the Applications Manager in your device's Settings.
5/ Transfer your apps and files to another device
Using your charging cable, you can transfer data from your Android device to a computer or USB drive.
You can do this by plugging your Android device's charging cable into your Android, and then plugging the USB end of the cable into your computer's USB port. From there, you can transfer images and files between the two systems or move them onto a separate USB.
6/ Use a hidden toggle for a feature called “Smart Storage”
It gives your phone permission to automatically remove backed-up photos after 60 days. It will also automatically remove backed-up photos and videos if the storage on your device has less than 25 percent space left. You turn it on (or off) via Google’s Files app.
-
Open the Files app and tap the three parallel lines in the upper left corner.
-
Select Settings.
-
Look for the Smart Storage setting and toggle it on.
7/ Store your photos online
Photos and videos can be some of the most space-hogging items on your phone. Luckily, if you’ve got an Android phone, you’re probably already uploading your photos to Google Photos — and can therefore take them off your phone.
First, check to make sure you are backing up your photos to your Google account.
-
Open the Photos app.
-
Tap on your personal icon in the upper right corner. If you’re backing up your photos, you should see a “Backup complete” entry in the drop-down menu.
-
If you’re not backing up your photos, then select “Photos settings” > “Back up & sync.”
-
Make sure that the “Back up & sync” toggle on top of the page is set to “On.” You should also check which account is listed under “Backup Account.” If you have more than one account, you can switch to whichever you want to use.